1. Introduction:
Project creation plugin helps to create a new project based on workflow transition of a particular issue. The App hepls in creating a trigger for the project creation so that when a particular issue status changes, a new project is created. Custom fields are used to define the project details at the time of project creation and status page helps to see the project created status.
2. Application Installation:
Step 1: Login as JIRA administrator. Go to -> Administration -> Manage apps -> Find new apps.
Step 2: Find the "Project Creation" and click "Get it now".
Step 3: Please install trial version license while using 30 days trial.
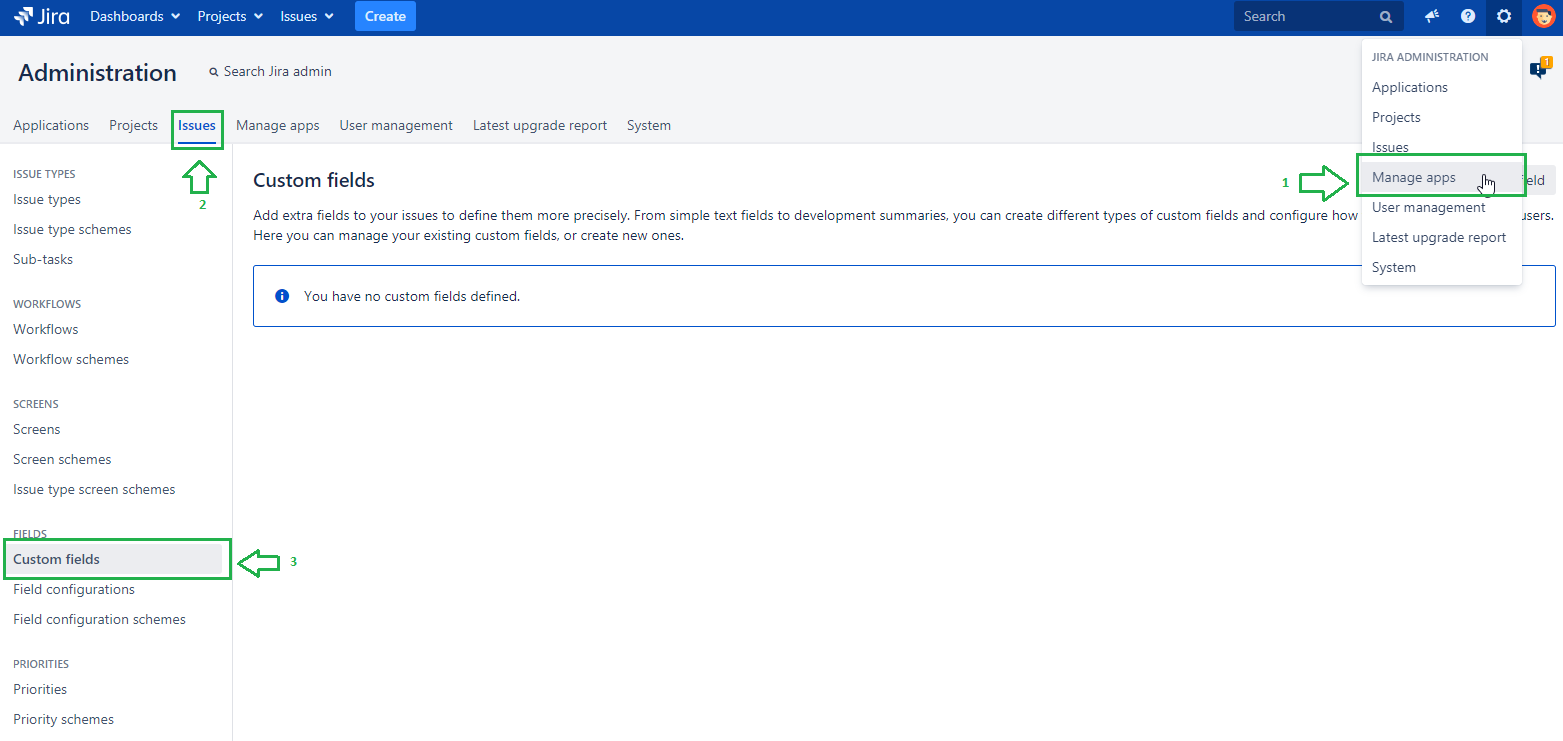
3. Configuring Custom fields:
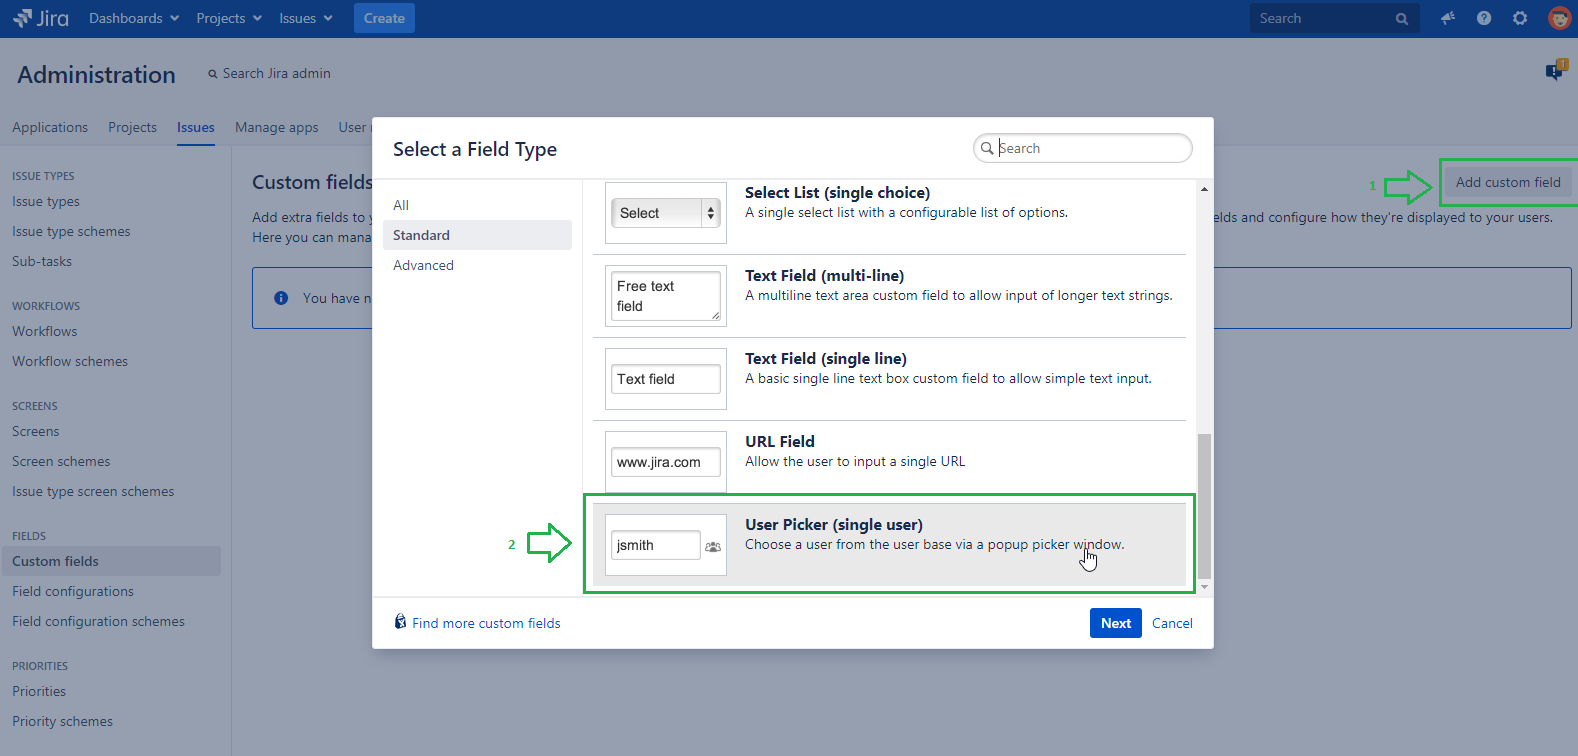
Step 1: Click on ADMINISTRATION →Issues→Custom Field→Add Custom field. Custom fields will be used to gather project details (Project name, Project Key, Project Description, Project lead).
Step 2: Click on Add custom field button and select field type, add following mandatory field.
- Project Name (Text Field(single line))
- Project Key (Text Field(single line))
- Project Description (Text Field(single line))
- Project Lead (User Picker(Single user)

4. Configuring Workflow Transitions triggers:
Once the custom fields are created, we can add the configurations in the project creation page found in the "manage apps" Jira admin page.
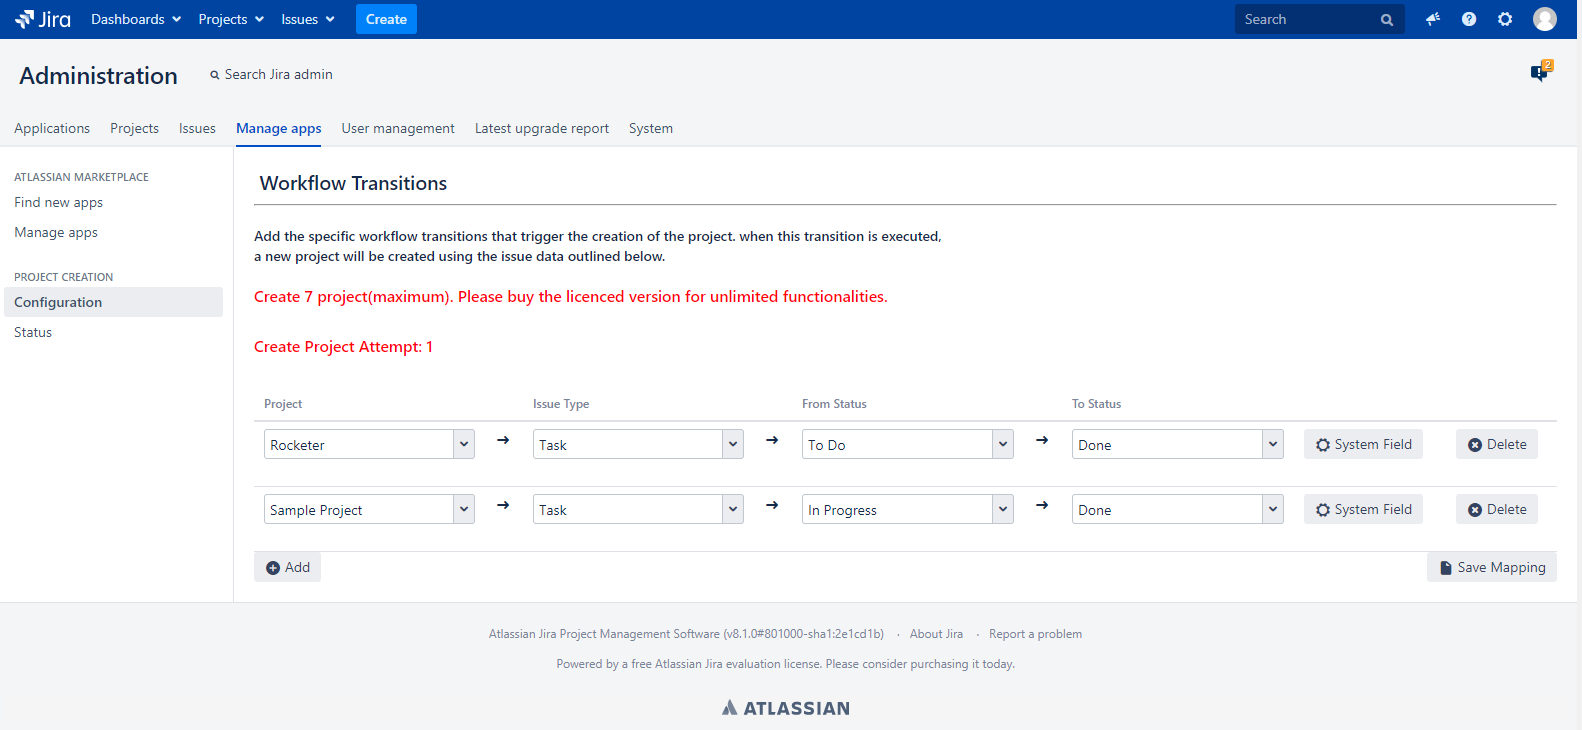
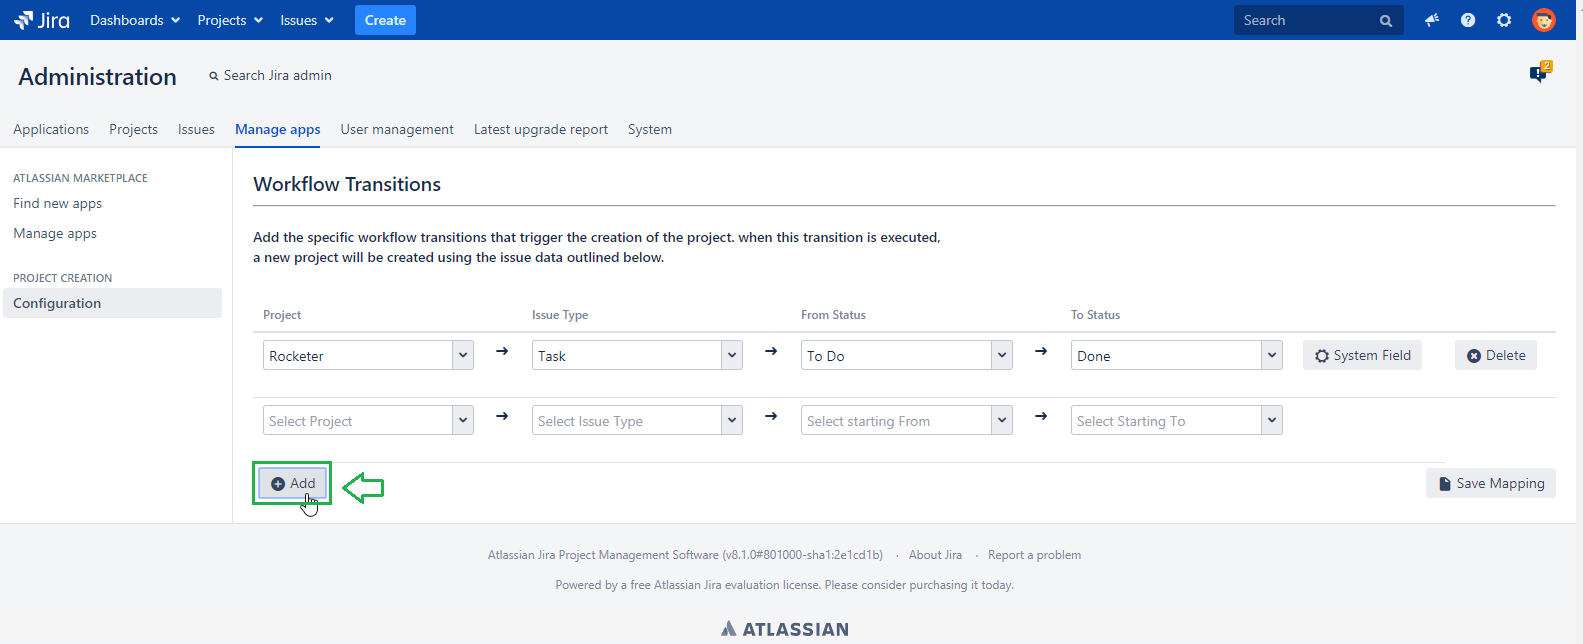
Step 1: Go to Administration→Manage apps→click on Manage apps→Configuration.
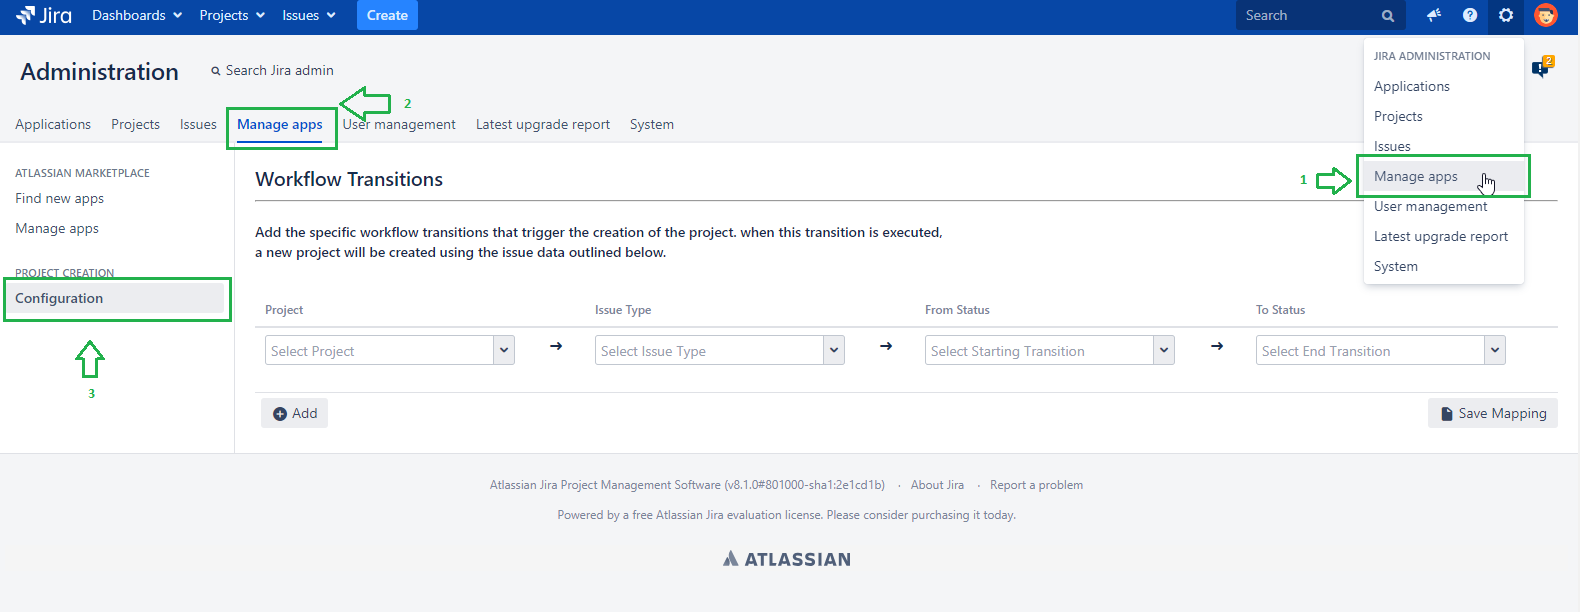
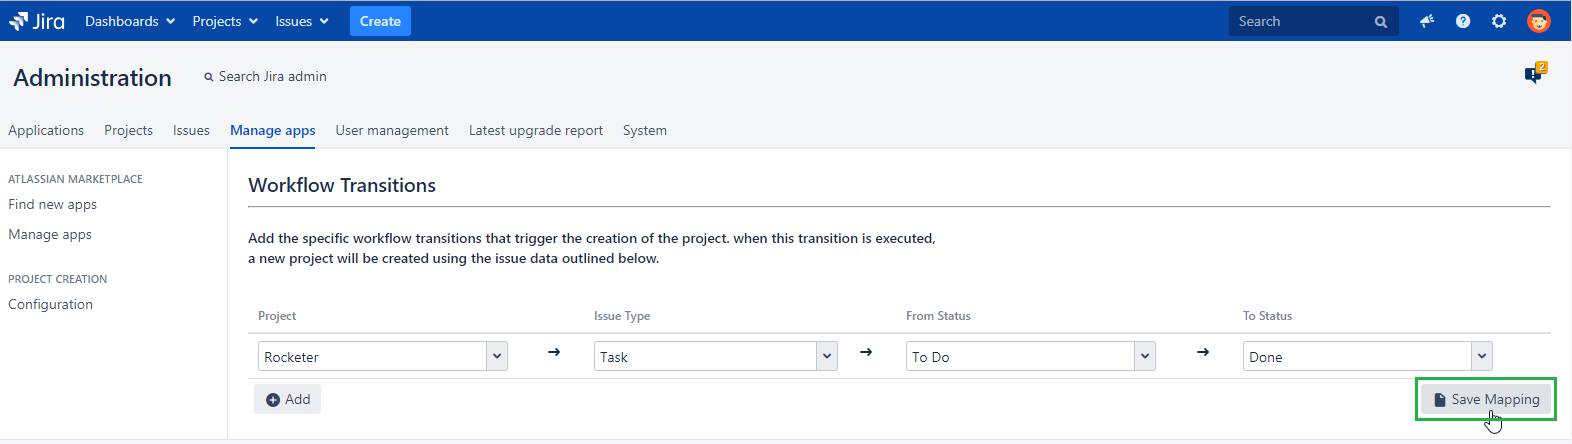
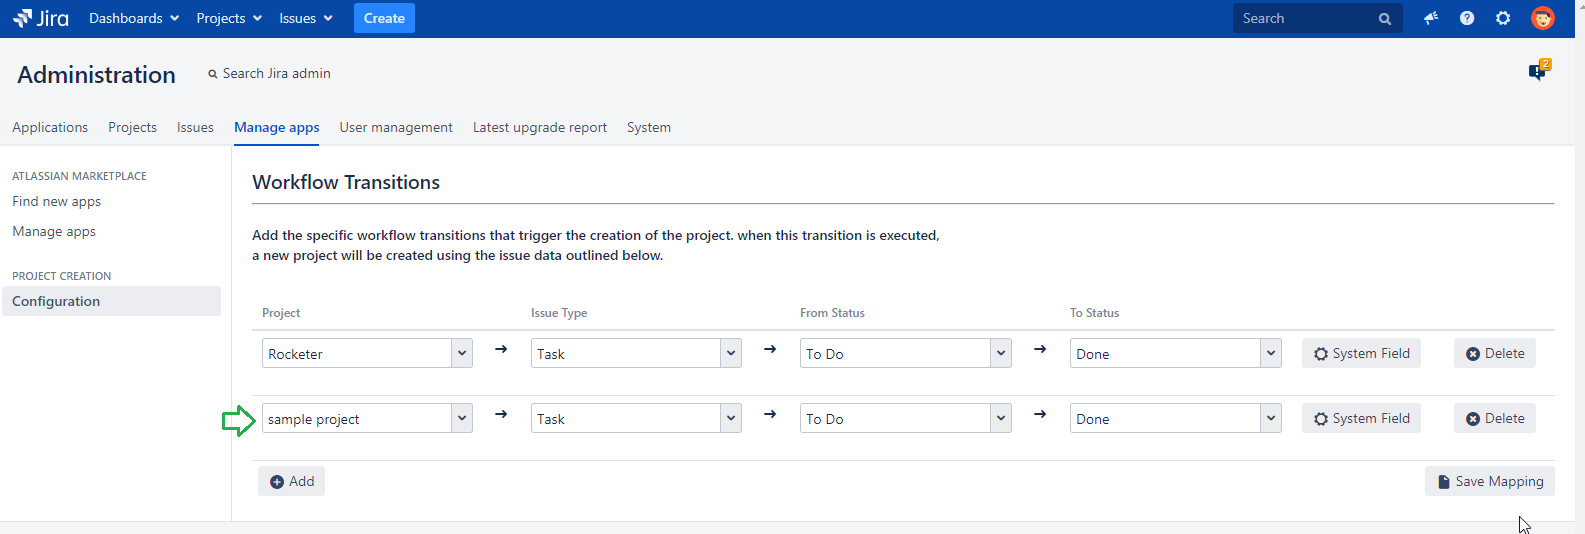
Step 2: Select Project name, issue type, From Status, To Status from drop down box. click on "Save Mapping" button.
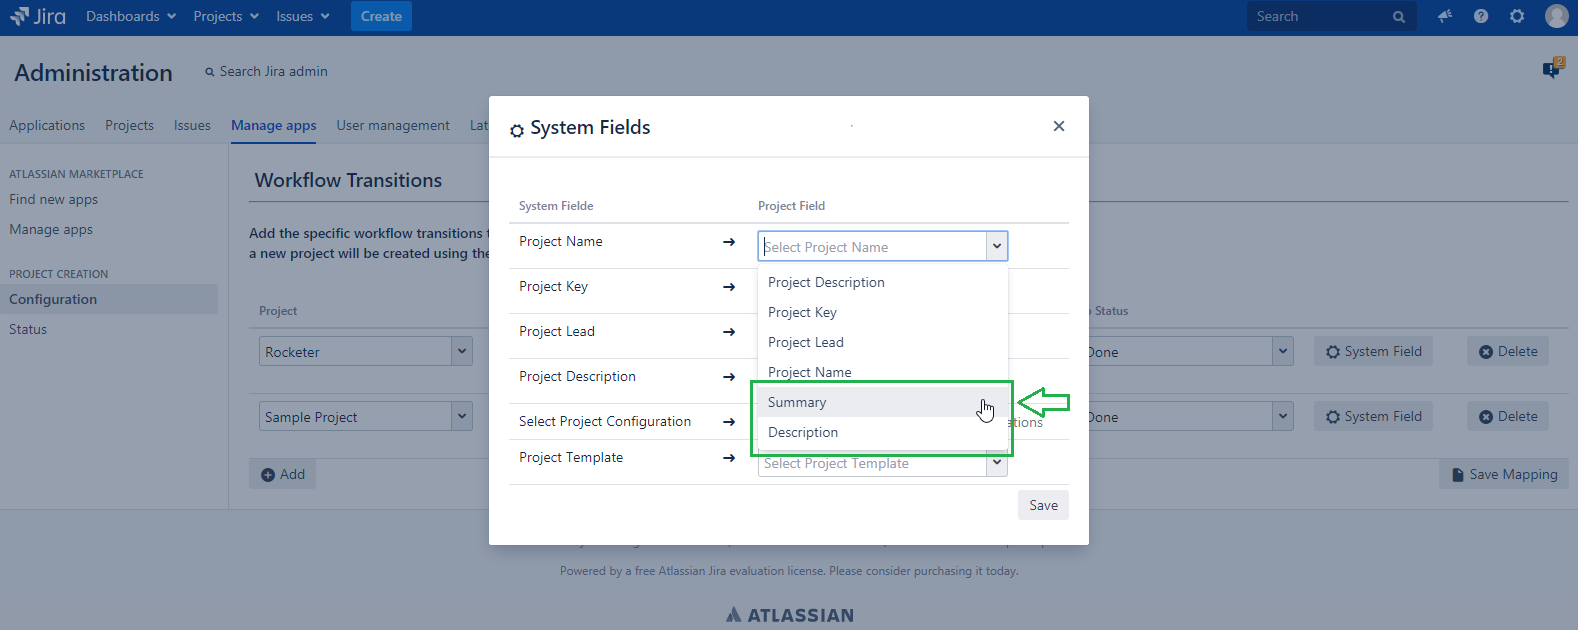
5.System Field Configuration:
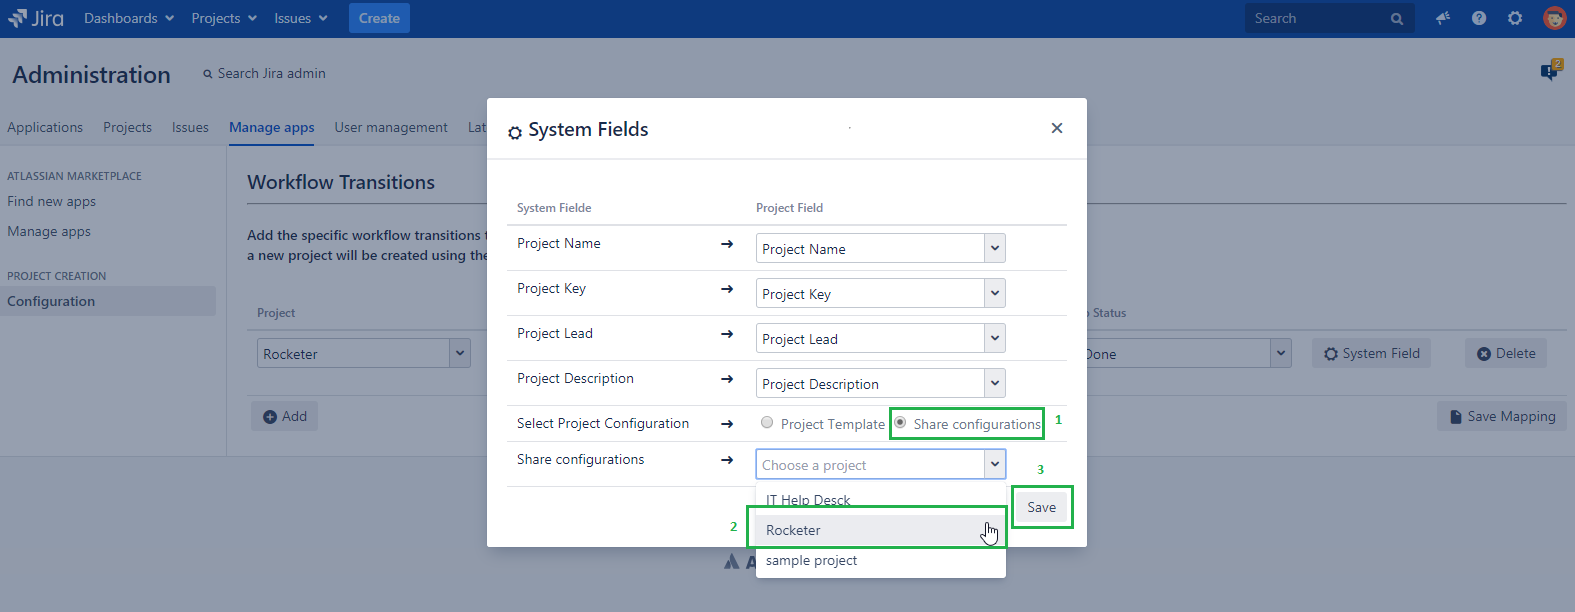
Workflow transitions configuration screen has system field button, it will appear after saving the workflow configuration.
Step 1: Click on System field button.

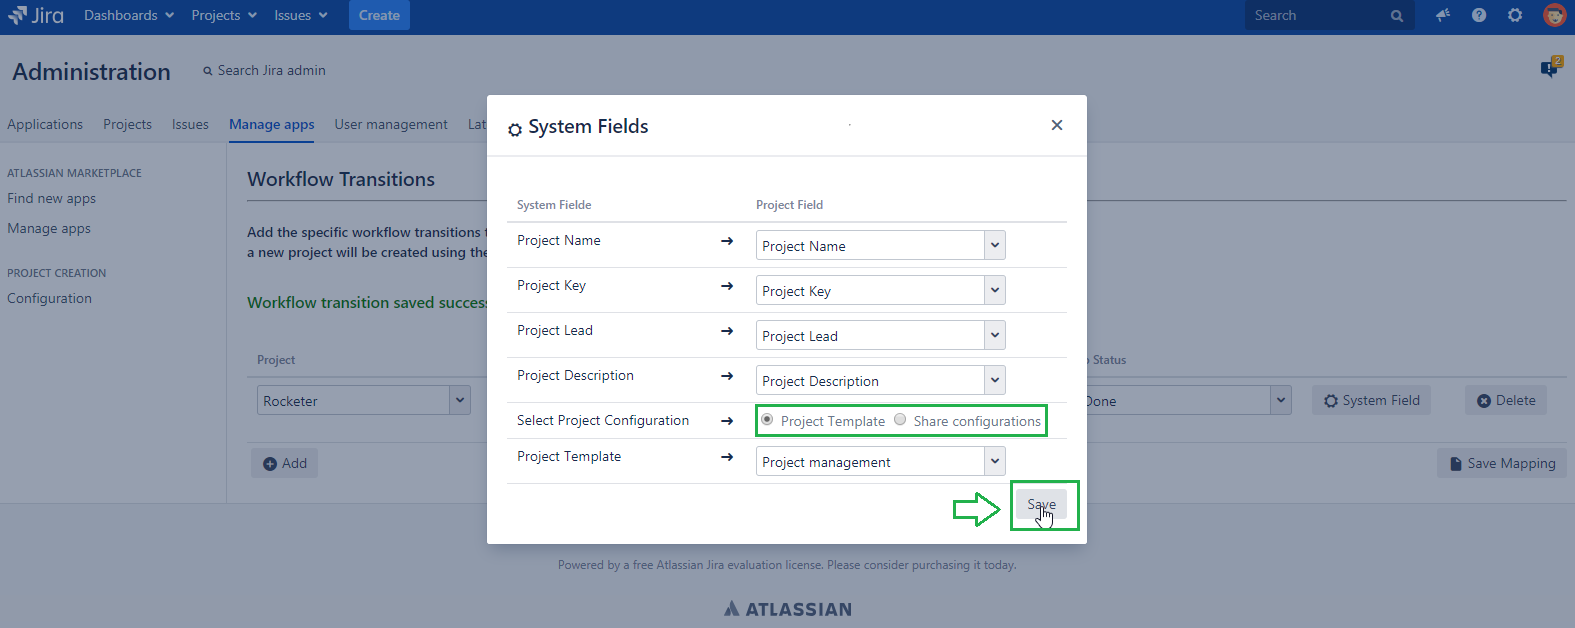
Step 2: Map the custom fields with system fields as shown below,
- Select the custom fields created earlier to the appropriate System fields (project name, project key, project lead, Project Description) and select project configuration type (Project Template or share configuration).
2. Click on "Save" button to save this configuration template (Project Template drop down box will show JIRA Core, JIRA Software, JIRA Service Desk templates).
Step 3: We can able to create multiple workflow configuration triggers by clicking on "Add" button.
Step 4: Share configuration option will allow to select the available projects to use their configurations (To create project with shared configuration). Share configuration helps in creating the new project that has all the project configurations (Permission schemes, Project notifications, Project Roles etc..) from the selected project
Step 5: Click on save button. Go to "project (rocketer)" and create a issue with issue type "Task".
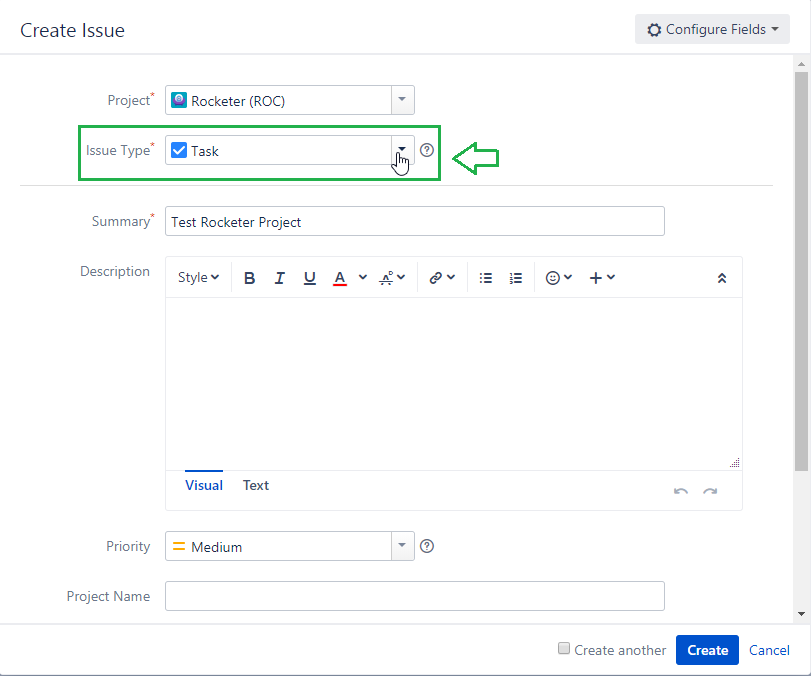
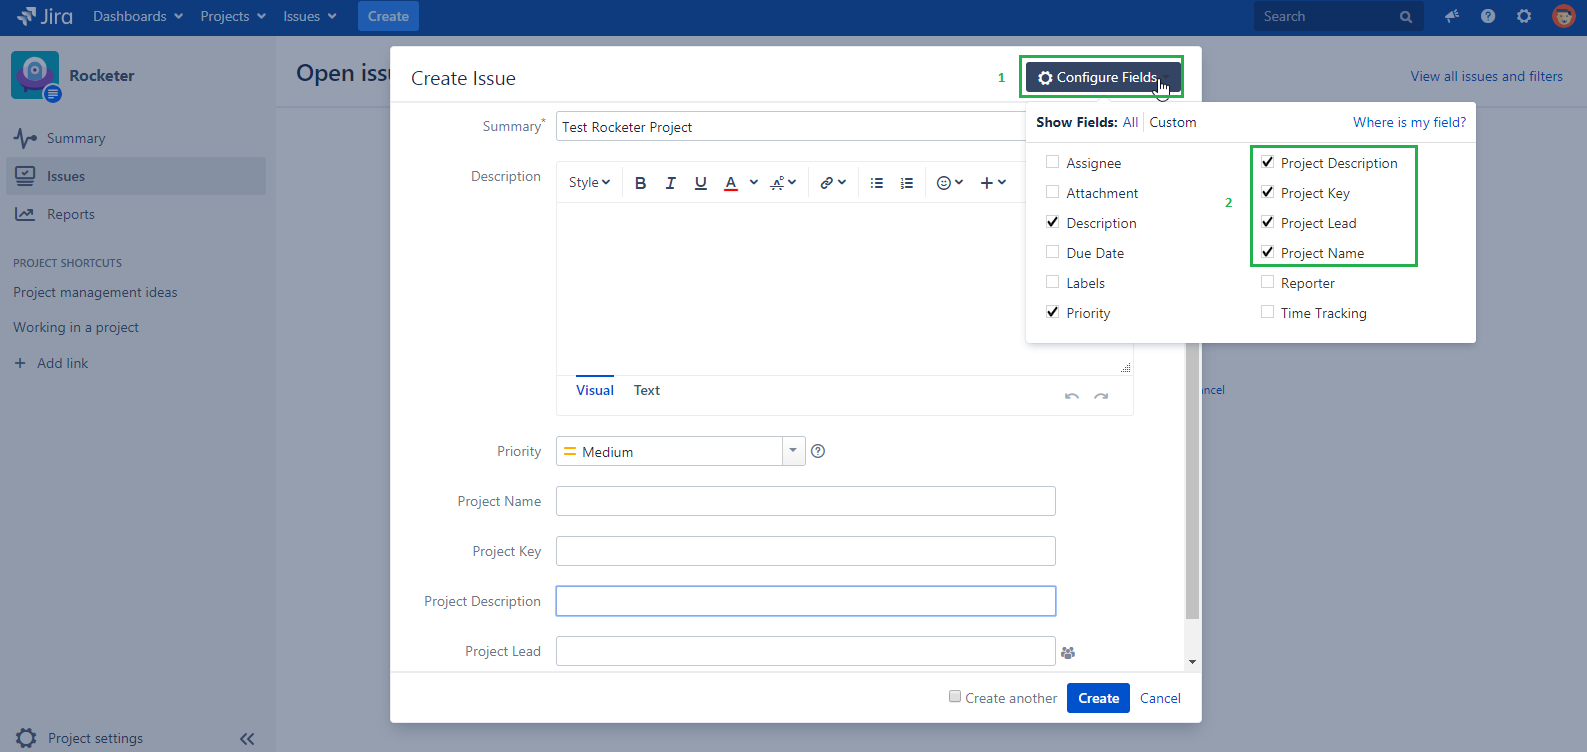
Step 6: Click on "Configure fields" in create issue screen and select the custom fields project name, project key, project Description, Project Lead.
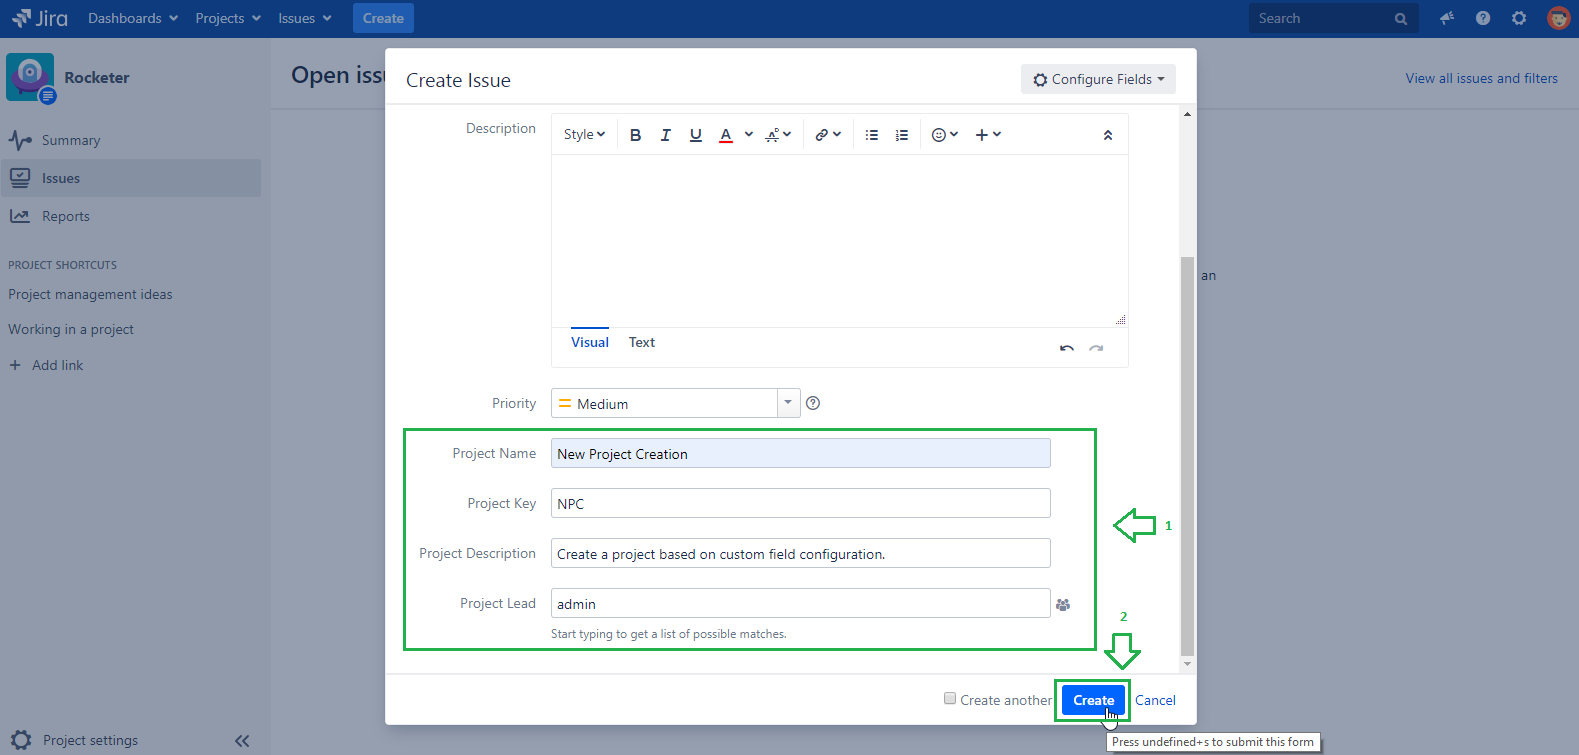
Step 7: Enter the custom field values for new project name, project key, project description and project lead of the project.
Step 8: Here we have configured in work flow transition screen "Rocketer->Task→To Do→Done". While transition meet the configuration
"To Do→ Done". The new project will create.
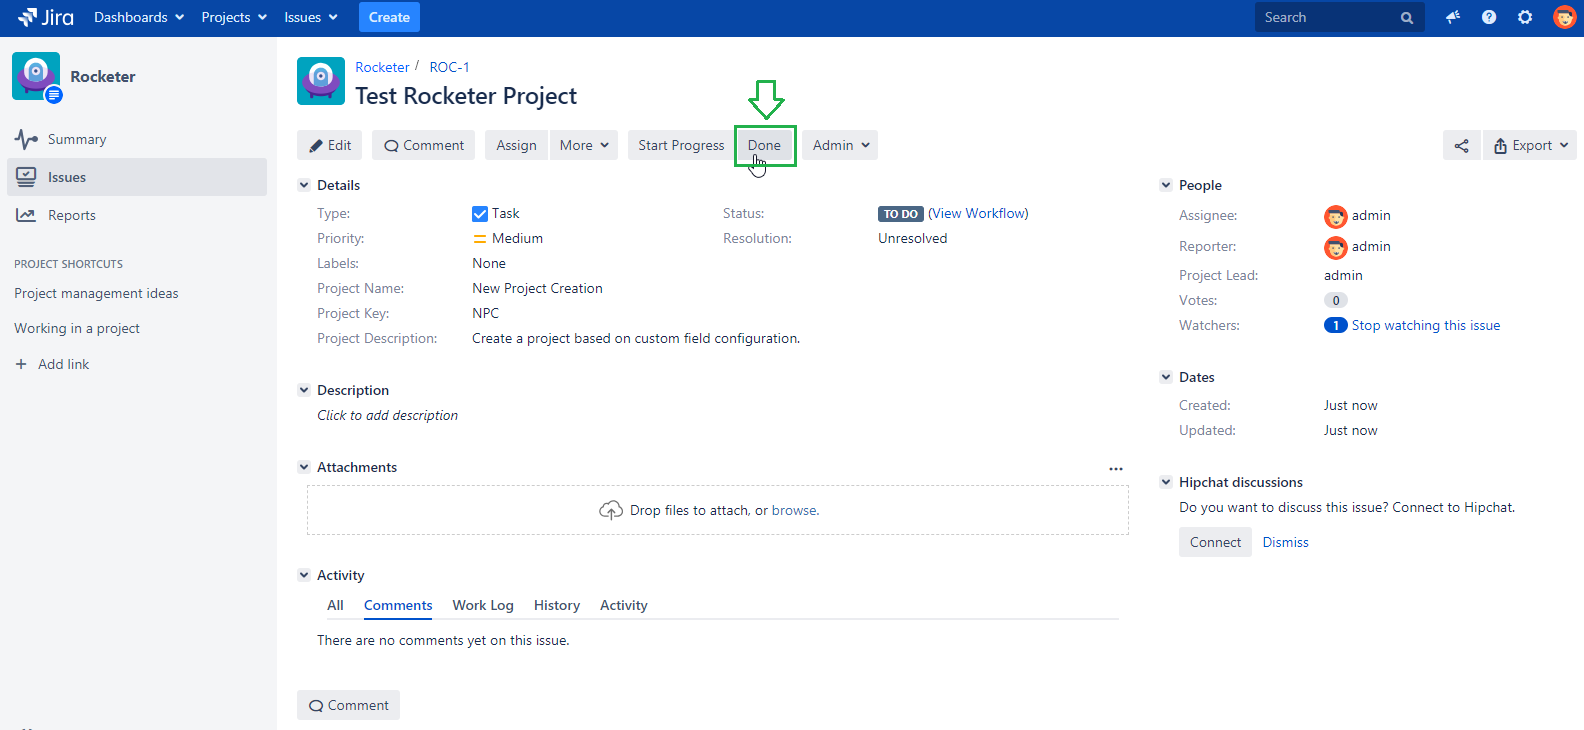
Step 9: please check the Project screen for new project created or not.

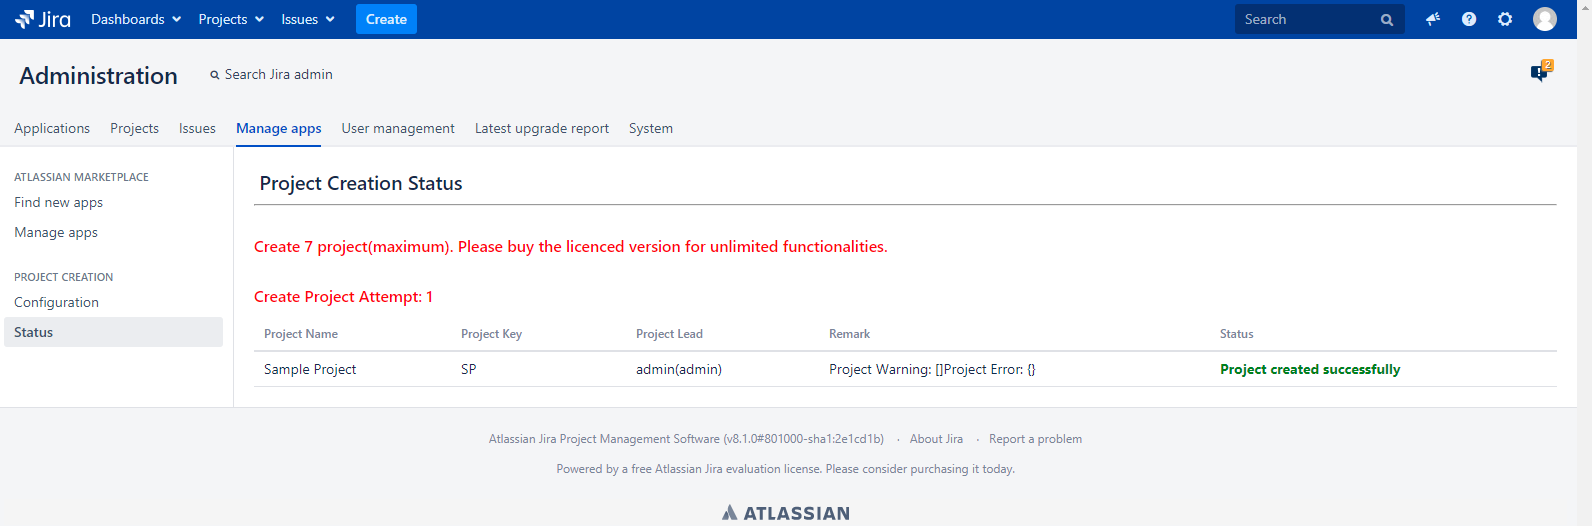
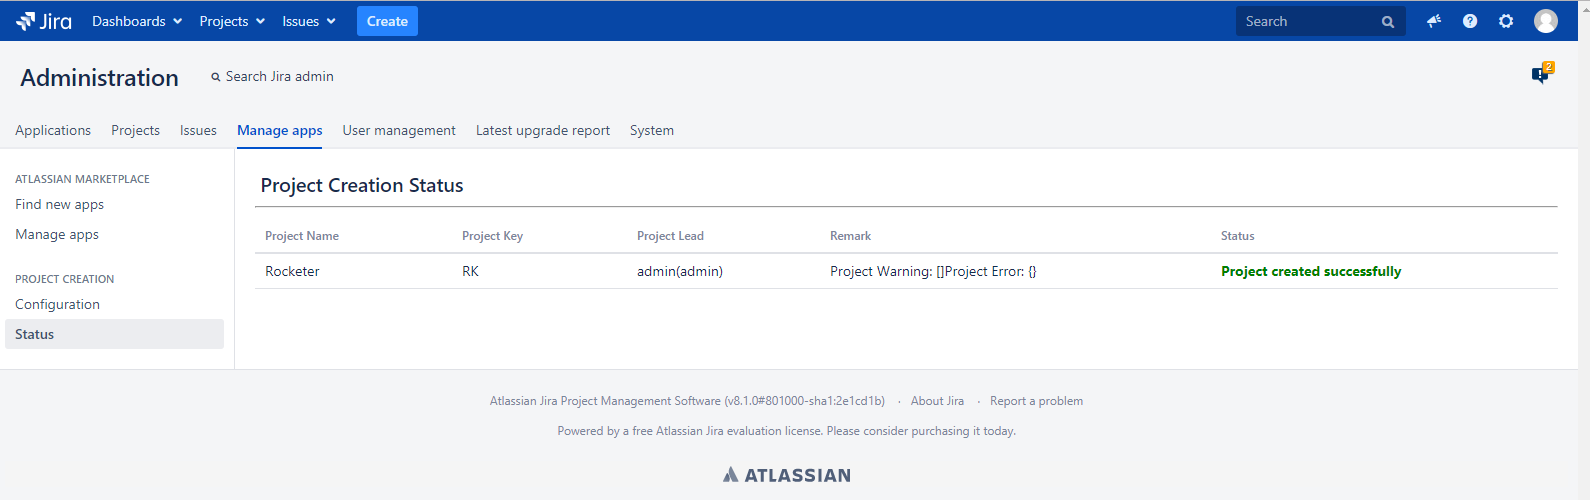
6. Status Page:
Status page helps to see the status of each project creation after the issue transition triggers the project creation.
Step 1: Got to Administration→Manage apps→click on Manage apps→Status.
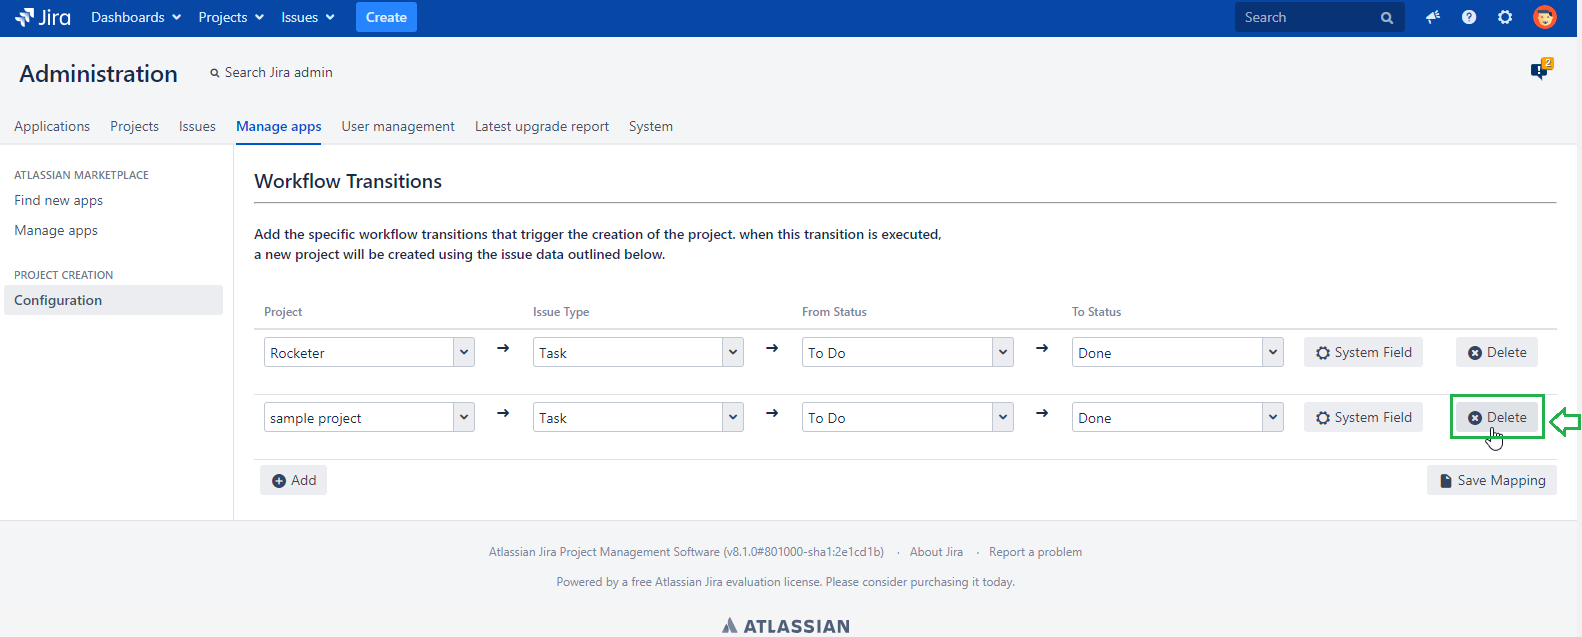
7. Delete the workflow transition and system field configuration:
You can delete the existing triggers and configuration by going to configuration in the Manage app Jira admin page
Step 1: Click on Delete button to delete the workflow transition and system field configuration.
8. License Condition:
- Trial version of plugin will allow a user to create 7 projects. After which the license has to be bought to further use the App.
- Project created/attempt(7) count will display in configuration and project creation status page.